This section explains how to add annotations to a tier, to use them once they are added, and to modify them. This is the heart of what ELAN is designed to do and what makes it so tremendously useful.
How to create an annotation depends on the type of the tier the annotation has to be added to. On time-alignable tiers new annotations (usually) are created with a specific begin and end time. On non-alignable tiers annotations inherit time information from a parent annotation that they depend on.
Select a tier to work with as the “Active Tier”. The easiest way to do this is to double-click on the name of the tier, at the left side of the Timeline Viewer. The name of the active tier will be underlined, red and bold. When a portion of the video is selected, the shading of the active tier inside the selection is pink rather than blue. The active tier is the one that normally receives new annotations.
A time-alignable annotation can be created on the junction of a selection and the active tier. There are several ways to do so:
In the Annotation menu select
Right click on a tier and from the popup menu select
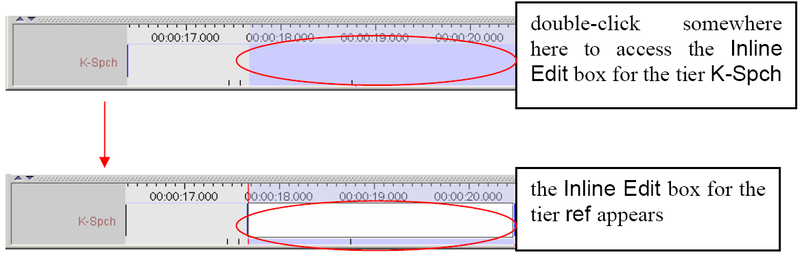
Double click in the area where a selection and a time alignable tier intersect
In all cases, the box appears, e.g.:
The same text edit box appears when double clicking an existing annotation. An alternative method to get an box is the following:
Click a time that should become the begin time of the annotation.
Press SHIFT+ENTER.
Click a time that should become the end time of the annotation.
Again press SHIFT+ENTER.
An box appears on the selected tier.
You can now enter an annotation value and then press the key ESC to commit the text. If you press the keys CTRL+ESC (without entering an annotation value), you create an empty annotation. To save the annotation you can either use the shortcut keys CTRL+ENTER, or right-click in the box and click on in the pull-down menu.
The window differs from the box in that it has a bigger, resizable display and supports line wrapping. It is therefore better for entering longer texts.
To enter an annotation into the box, do the following:
Either make a selection in the Timeline Viewer, or click on an existing annotation in the Timeline or Interlinear Viewer.
Access the box
Do one of the following:
Either use the shortcut keys SHIFT+ENTER.
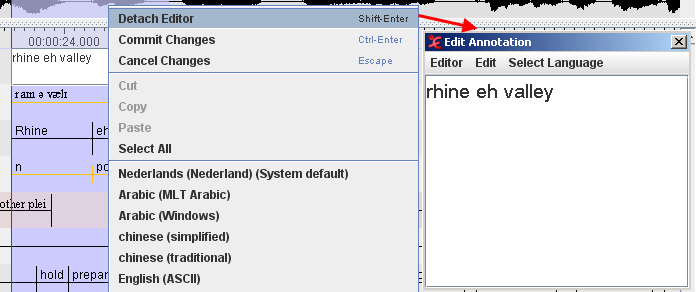
Or right-click in the box. A pull-down menu appears. Click on .
The box appears:
The box is automatically preconfigured for the default character set of the tier. If you want to use a different character set, do the following:
Click on . A pull-down menu appears that displays the available character sets, e.g.:
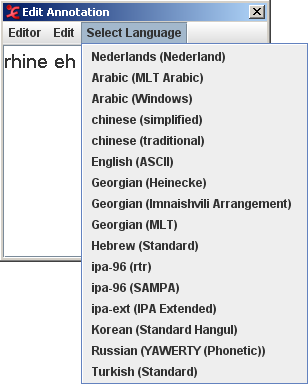
Click on the appropriate character set. From now on, the characters are entered in the selected set.
To switch back to the default character set, repeat the steps above and select the default set from the pull-down menu.
Edit the annotation.
Save the annotation by doing one of the following:
Use the shortcut keys CTRL+ENTER.
In the box, click on and then click on in the pull-down menu.
To exit the box without saving, do one of the following:
Use the shortcut key ESC.
In the box, click on and then click on in the pull-down menu.
To return to the box, do one of the following:
Use the shortcut keys SHIFT+ENTER.
In the box, click on in the pull-down menu.